To optimize the capabilities of Flowis Play’s Invoicing system, your initial step involves configuring your Entity and Banking details. This process is streamlined and caters to both Advanced and Premium subscription levels. With the Advanced subscription, you can create a single Entity, whereas the Premium subscription offers the flexibility of generating unlimited Entities. All other functionalities and features remain consistent across both subscription levels.
Accessing Entities Setup
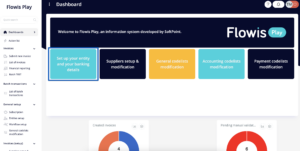
Entities setup can be accessed directly from the Dashboard:
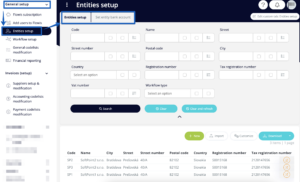
Or via the left menu under the “General setup” section:
Managing Entities
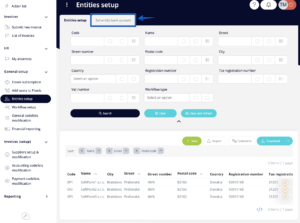
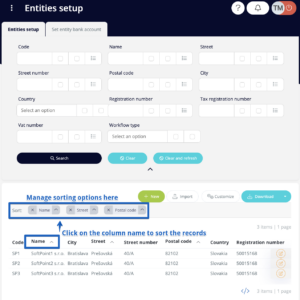
Upon accessing the Entities setup, you’ll encounter a list of records along with various management options:
At the top of the screen, you have the filter which will help you search for those records that you need. Below the filter, you will see four buttons with various actions:
- New – facilitates manual addition of new Entity records, requiring comprehensive data input such as name, address, registration number, tax details, and workflow type selection for Invoice processes – read further to learn the differences among available workflow types. Ensure to click “Save” upon completion to preserve your data.
- Import – enables bulk import of records from a .xlsx file. However, the imported file needs to meet certain rules regarding the contained columns and their names – you can obtain the file template by clicking on the “Download” button. This way, you will get a file with the correct columns and only need to fill it with your data.
- Customize – empowers users to tailor column views based on personal preferences, ensuring a customized experience without affecting other users’ views.
- Download – offers downloading options in various formats, catering to specific user requirements. If you previously used the filter to show only some of the records, only those that meet the filtering criteria will be downloaded. If you wish to download the whole list of all Entities, you must first clear the filter (use the “Clear and refresh” button).
Below these four buttons, you see the Entities. There is an icon of a pencil at the end of each row which will allow you to edit the data regarding that selected Entity. You can also easily sort the list by clicking on the name of the sorting column; and change the sorting direction by clicking on it one more time. Delete the sorting whenever you need by simply clicking the X in the “Sort” row.
Workflow types
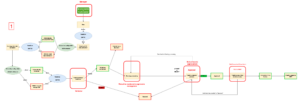
Each Workflow type is specific by its approval process. The first one, Simple Workflow type, is the shortest – after the manual validation, the Transaction proceeds to the “Pending processing” Status, where the accountant has to manually choose the approver who then has to approve (or reject) the Transaction. After approval, the invoice is sent to accounting review.
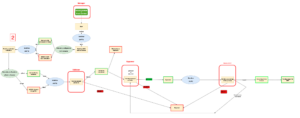
The Advanced Workflow type uses the Assignments to find the correct approver for given Transaction after the manual validation is done. Once the invoice is approved, it is sent to accounting review. For this Workflow type to work, you first need to set up your Assignment Groups and Assignments.
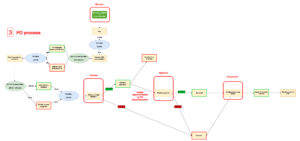
The Complex Workflow type uses purchase orders to find the correct purchase order buyer or approver who will approve the Transaction. After the manual validation, receipt needs to be matched with the invoice (automatically or manually) and then the correct approver can be found and assigned to approve the Transaction. After approval, the Transaction proceeds to accounting review.
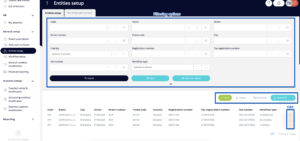
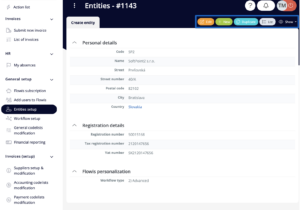
Viewing Entity details
Clicking on an Entity row reveals detailed information in a separate window, providing options such as:
- Edit – facilitates Entity details modification
- New – allows manual creation of a new Entity
- Duplicate – enables Entity duplication for streamlined record creation
- List – redirects to the comprehensive list of all Entities
- Show – provides navigation between different Show permissions, offering varied field displays
After Entity setup, proceed to configure Banking details in the “Set entity bank account” tab, mirroring the Entity configuration process.