
After the Workflow has been executed, the system can automatically send predefined e-mails. In this section, you can design how the e-mail should look, who should be the recipients, if there should be some attachments, etc. Let’s have a closer look at different options for the e-mails.
E-mail conditions – Show/hide conditions
Here you can set up the conditions that must be met for the e-mails to be sent. In case no field is filled in, an e-mail will be sent always.
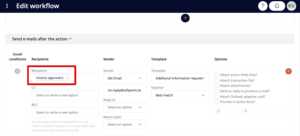
Recipients
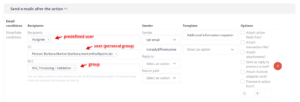
Here you can set up people who will receive the e-mail. You can choose from some predefined fields. For example if the Workflow assigns the Transaction to specific User (via Assignment), you can send email to “Assignee”. There are some other predefined fields, e.g. Assignee’s manager or Requestor. But you can also set up specific User, specific e-mail address, specific Assignment (Users defined in Assignments), specific transaction field (if the User or e-mail address is filled in this specific field), or even the Group (in case of Group, if the shared mailbox is set up in the Group settings, e-mail will be sent to this shared mailbox. Otherwise the e-mail will be sent to personal e-mail mailboxes of all Users in the Group.)
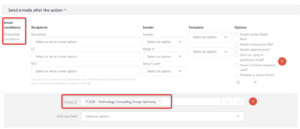
If you want to send e-mail to the person filled in specific Transaction field, you have to search for it and choose the one with the description “Transaction fields”:
Sender
- Sender – set up the sender of the e-mail
- Reply to – if the receiver decides to reply to the e-mail, his reply will be sent to this e-mail address
- Return path – if the e-mail could not be delivered for any reason, it will be returned to this e-mail address
– Email address – choose from your e-mail addresses saved in Flowis
– Evaluate Ruby – contact your IT administrator who can write a Ruby code to select a specific e-mail address (e.g. from a specific field on the Transaction)
– Set email – fill in the specific e-mail address

Template
The template defines the body and subject of the e-mail. E-mail template can have various versions and each version has its separate input conditions (for example, you have a separate version for each language mutation, and the conditions say for which countries should this language mutation be used). The template must be first set up in E-mail templates.
- Best match – Flowis will select only one version of the E-mail template that matches the most conditions (Transaction’s details vs. e-mail template’s version’s conditions).
- Match all – all the versions that match any of the conditions will be used and put one after another. The one that matches the most conditions will be at the top.
- Match all – join with line – the same as “Match all”, but the matched versions will be separated by a line (you will see where one version ends and another one begins).
- Match all reversed – the opposite of “Match all” – the version that matches the least of conditions will be at the top.
- Match all reversed – join with line – the same as “Match all reversed”, but the versions will be separated by a line.
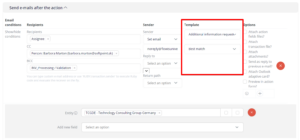
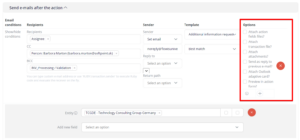
Options
- Attach action fields files? – the attachments from any of the Active Storage Blob data type fields will be attached to the e-mail.
- Attach transaction file? – the transaction file will be attached to the e-mail. (e.g. Invoice pdf).
- Attach attachments? – the attachments added to the system field “Attachment” in any of the statuses will be attached to the e-mail.
- Send as reply to previous e-mail? – if the User receives any other e-mail notifications regarding this Transaction, the e-mail from this Workflow will be marked as a reply to these notifications (grouped in one thread in the User’s e-mail box).
- Attach Outlook adaptive card? – the User can make an action directly through the e-mail received in his mailbox without having to log in. This feature can be used only with Office 365 Microsoft e-mails. For more info you can visit this link: https://learn.microsoft.com/en-us/outlook/actionable-messages/. The setup has to be configured in SMTP settings. Please contact your IT administrator to learn more about this option.
- Preview in action form? – User can preview the e-mail before executing the Workflow from the action form.
This function of sending e-mails can be also used when commenting on the Transaction without changing the Status of the Transaction, which is defined in Comment Permissions.
Continue to our Workflows 6 article to look at some practical Workflow setup examples.
