Cultivating accuracy within your information system’s invoice postings begins with the setup of accounting codelists. These foundational elements serve as the backbone of your financial operations, ensuring precision and coherence in every transaction. Read further to learn how to set up your:
- activities,
- taxes,
- accounts,
- accounting rules,
- accounting types,
- cost centers,
- projects,
- posting templates, and
- ERP templates.
Accessing Accounting Codelists
Initiate the modification of Accounting codelists directly from the Dashboard by clicking on the fourth box:

Alternatively, access it from the left menu by selecting the “Accounting Codelists Modification” option within the “Invoices Setup” section. Navigate through the Accounting Codelists using the tabs located in the upper section of the screen:
The initial tab provides a quick guide outlining the functionality of accessible buttons, while subsequent tabs house the Accounting codelists.
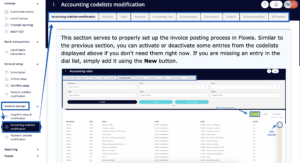
Managing Accounting Codelists
Upon entering any of the Accounting Codelists, such as Cost centers, a list of pre-filled records and several options for record management becomes visible.
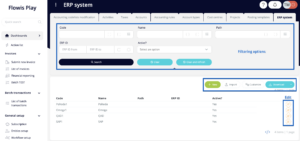
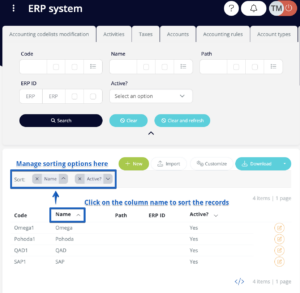
At the screen’s top, a filter facilitates the search for specific records. Below the filter, a few buttons offer various actions:
- New – this button may be available only in some of the codelists. It allows you to manually add new records to the codelist. You will need to fill in all the data. When you are finished, do not forget to click “Save” not to lose your data.
- Import – enables bulk import of records from a .xlsx file. However, the imported file needs to meet certain rules regarding the contained columns and their names – you can obtain the file template by clicking on the “Download” button. This way, you will get a file with the correct columns and only need to fill it with your data.
- Customize – tailor column views according to your preferences. If you wish to see more columns, or fewer columns, or see them in different order, you can set it up with this button. This setup will only be visible to you – you will not impact how other Users see this list.
- Download – after clicking the little arrow at the end of the button, you can see the list of the downloading options – which format you want to download. If you previously used the filter to show only some of the records, only those that meet the filtering criteria will be downloaded. If you wish to download the whole list of all Entities, you must first clear the filter (use the “Clear and refresh” button).
Beneath these buttons lies the list of records. Each row features an icon allowing the editing of the “Active?” field. Marking a record as inactive excludes it from invoicing processes.
Sorting the list is convenient, achieved by clicking on sorting column names. Sorting direction is adjustable, and sorting can be cleared with a simple click on the X in the “Sort” row.
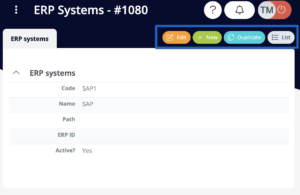
Viewing Details
Clicking on a specific row reveals the details of the corresponding record in a separate window. In the top right corner, several buttons offer different options:
- Edit – modify the details of the record
- New – manually create a new record, available only in selected codelists
- Duplicate – create a new record by duplicating this one
- List – redirect to the list of all records