Crafting a seamless and efficient invoice processing system continues with Payment codelists, the cornerstone of financial operations, ensuring accuracy and consistency in every transaction. Delve deeper into this guide to understand the intricacies of configuring codelists for payment details:
- banks,
- payment formats, and
- payment types.
Accessing Payment Codelists
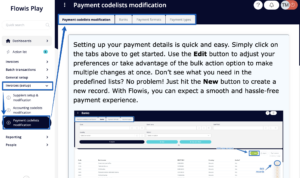
Managing Payment Codelists
When you access any of the Payment Codelists, like Payment formats, you’ll see a list of pre-filled records with various options for managing them.
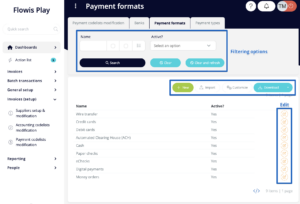
At the top of the screen, a filter helps you find specific records. Below the filter, you’ll find several buttons for different actions:
- New – this button allows you to manually add new records to the codelist. You’ll need to fill in all the necessary data and remember to click “Save” to preserve your changes.
- Import – this option lets you bulk import records from a .xlsx file. However, the file must adhere to specific rules regarding columns and names. You can download the file template by clicking on the “Download” button.
- Customize – use this button to tailor column views according to your preferences. You can choose to see more or fewer columns or arrange them in a different order. These customizations are visible only to you.
- Download – after clicking the arrow at the end of the button, you can select the format for downloading. If you previously applied a filter, only the records that meet the filtering criteria will be downloaded. To download the entire list, clear the filter using the “Clear and refresh” button.
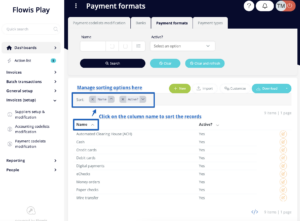
Below these buttons, you’ll find the list of records. Each row includes an icon to edit the “Active?” field, allowing you to exclude inactive records from invoicing processes.
You can easily sort the list by clicking on column names, and the sorting direction can be adjusted. To clear the sorting, simply click on the X in the “Sort” row.
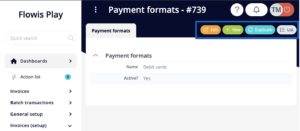
Viewing Details
When you click on a specific row, you’ll see the details of that record in a separate window. In the top right corner, you’ll find several buttons with different functions:
- Edit – this allows you to modify the details of the record
- New – you can manually create a new record using this option, which is available only in selected codelists
- Duplicate – this option lets you create a new record by duplicating the current one
- List – clicking here will redirect you to the list of all records